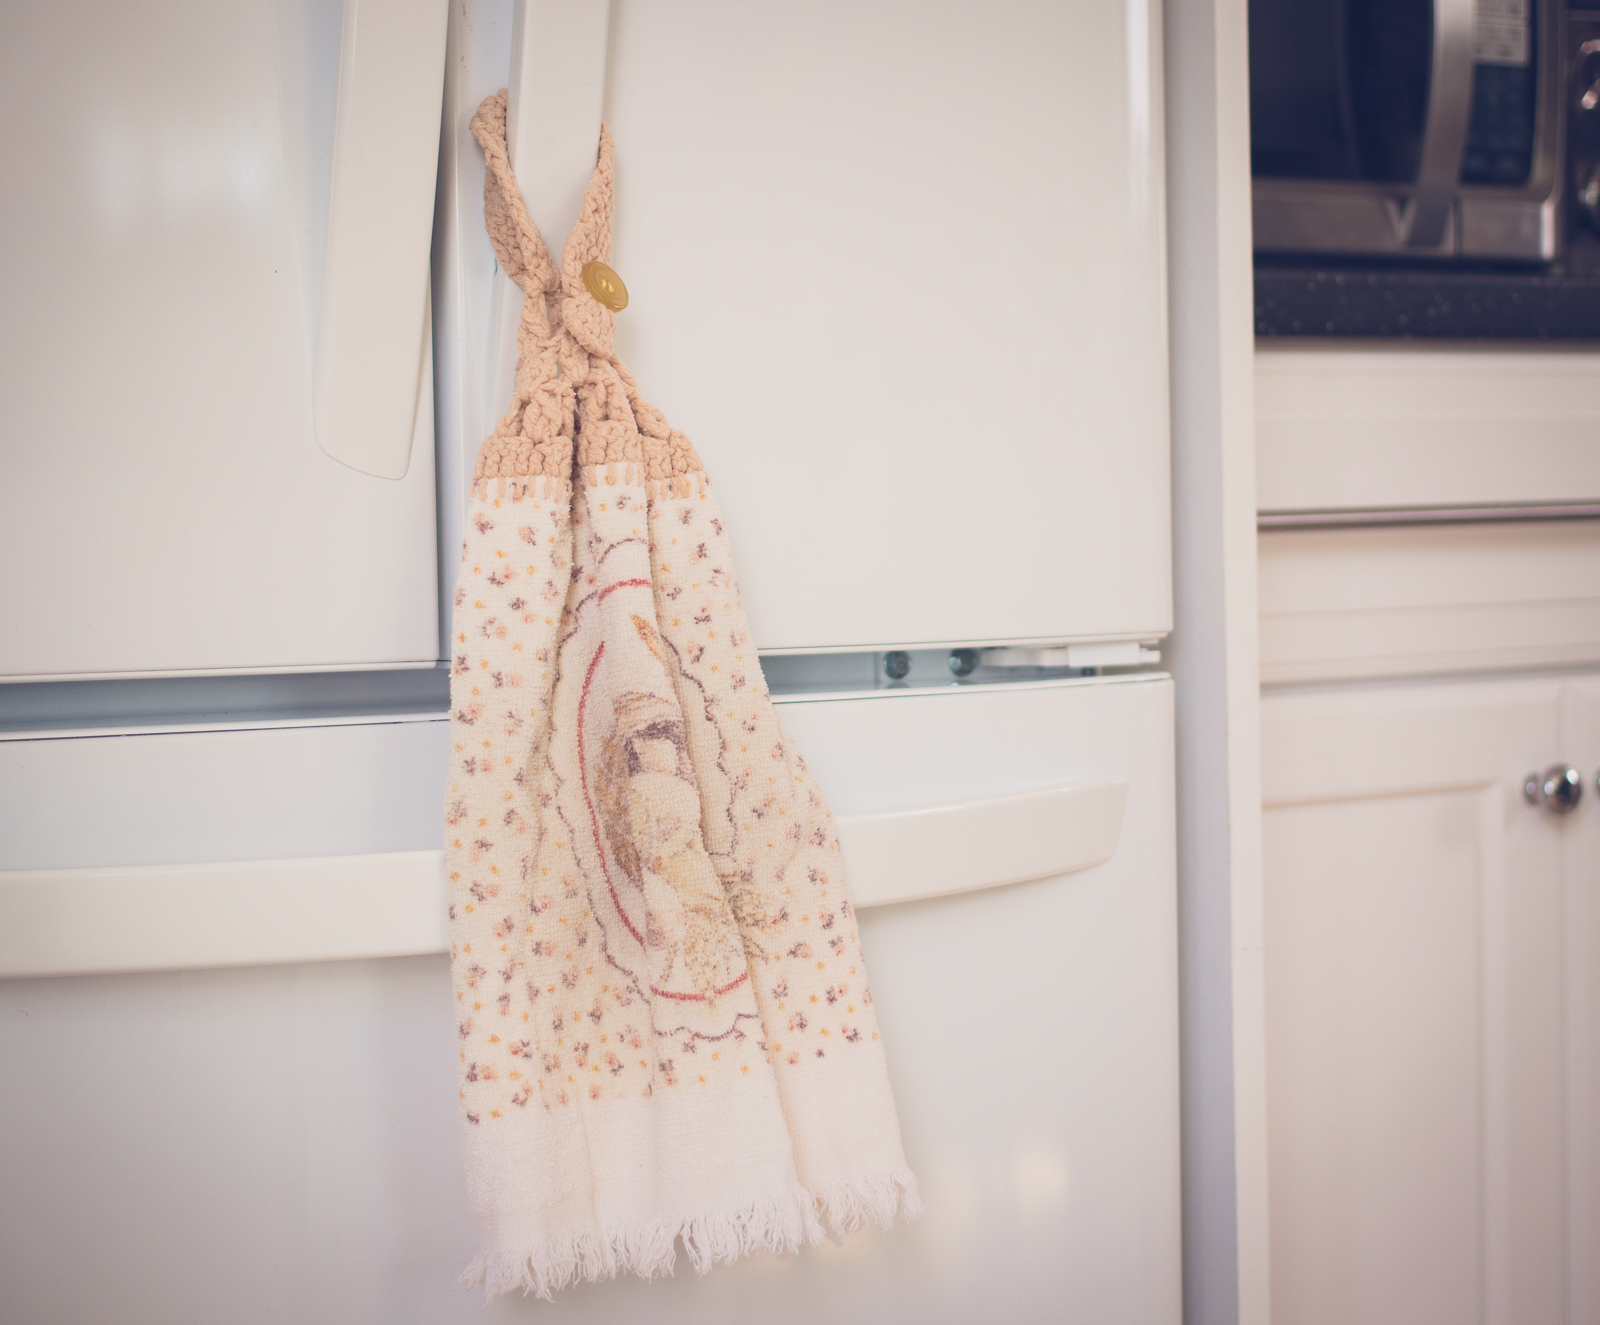
In my house growing up, there was one fixture in the kitchen that was ever-present: the hand towel on the refrigerator door. Today in my own place, I always have a dishtowel on the handle of the oven, but it’s just hung over the handle, and sometimes misplaced when someone dries a dish or uses it as a makeshift potholder to pull a dish out of the oven. No, when I was growing up this was never a problem, because our dishtowels always had crocheted tops, crafted by my Granny, which buttoned over the handle of the refrigerator and made sure no kid would dry their hands and throw the towel to the floor.
My dear Granny passed away last July, and even before then hadn’t made new dishtowels in years. I think her passing, plus my asking, “Is there anything you’d like me to make you for Christmas?” (I always like soliciting ideas…guessing what handmade item someone wants is nerve-wrecking!) prompted my mom to ask me to re-create my Granny’s dishcloths for her. She bought a couple of dishtowels that matched her kitchen, packed them up lovingly with a tattered example of a towel from my Granny and sent them up to New Jersey for me to re-create.
To be honest, with the business of the holiday season, I left the package unopened for a few weeks. I was noodling in my head how to attach crochet to the top of a dishtowel…how do you poke the first row through the top of the towel? Is there a sharper kind of crochet hook to use? It was a bit intimidating thinking that I had this project I’d committed to do that I really dind’t know how to start on. Finally, in a small break over Thanksgiving weekend, I finally opened up the package and took a look at my sample to copy.
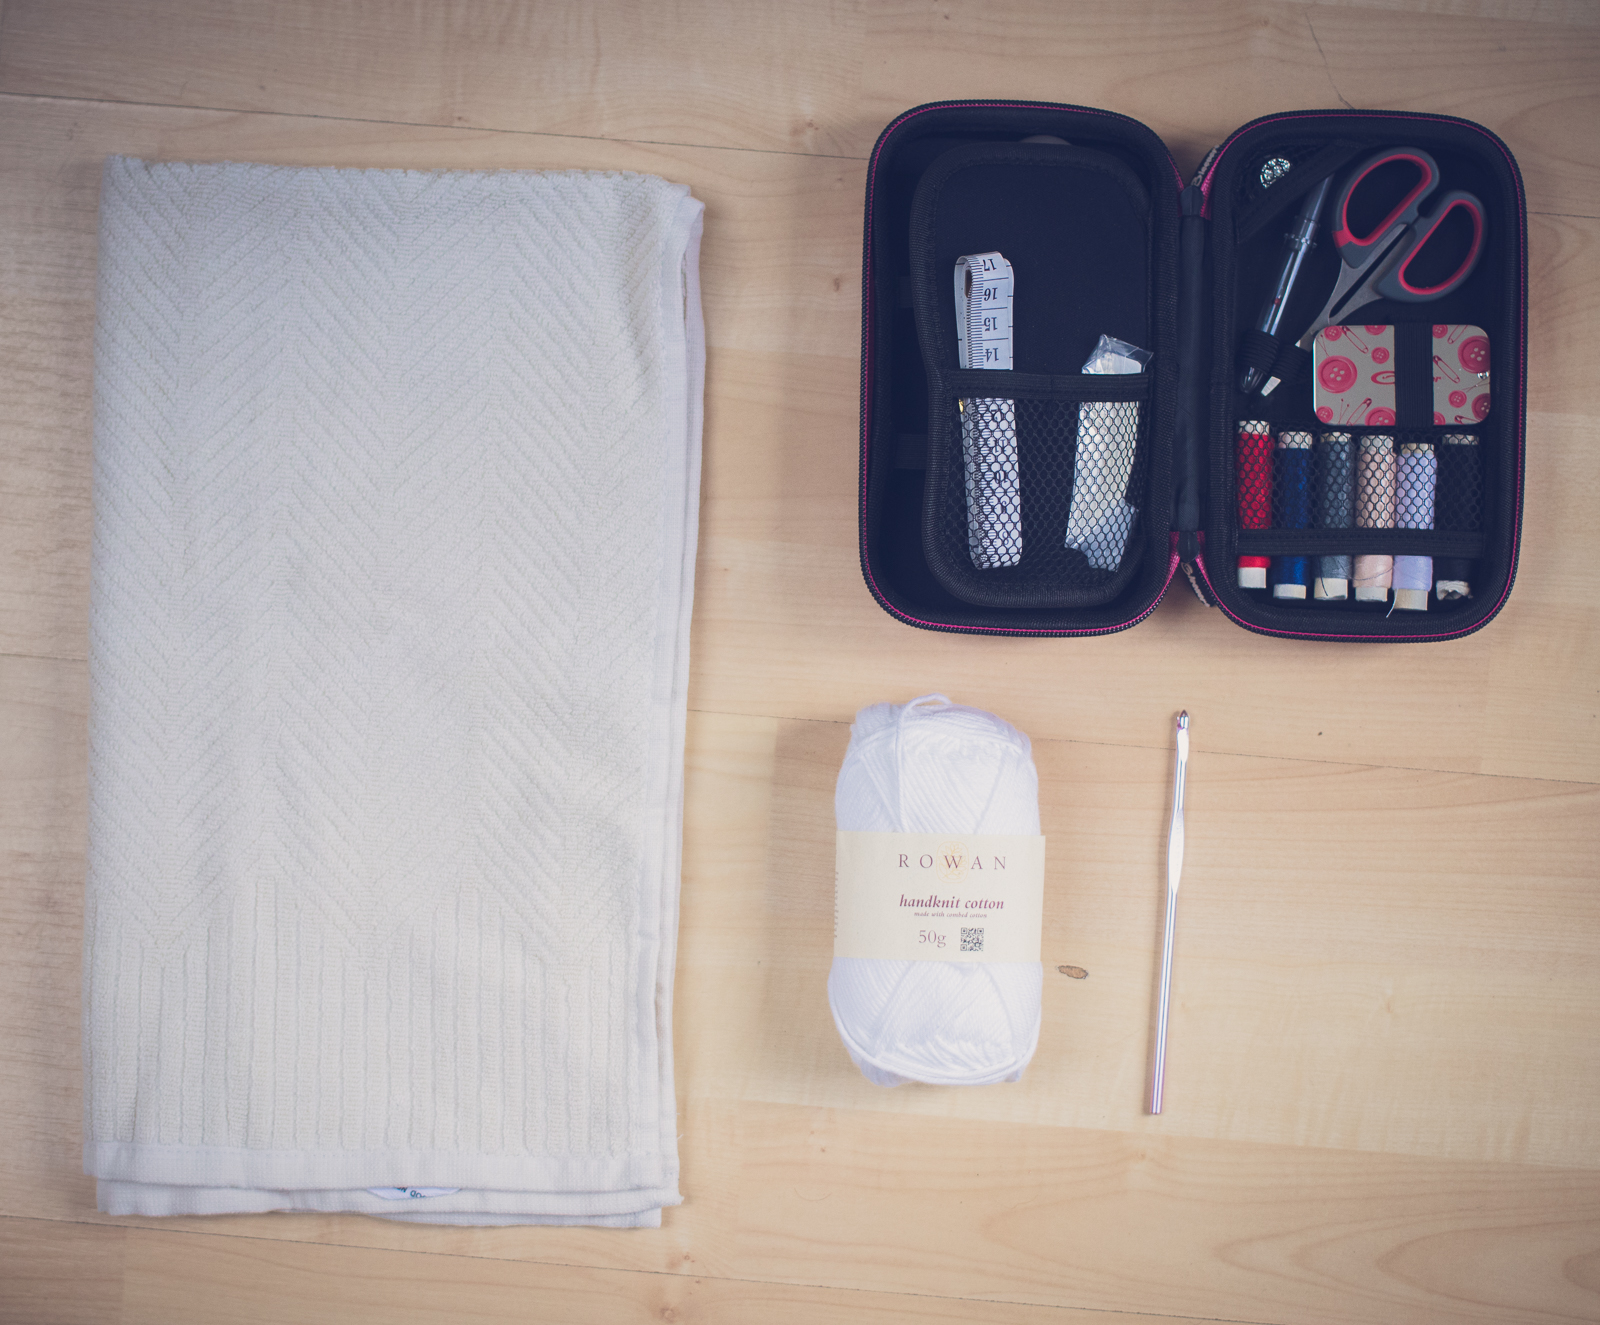
I gathered some supplies together to start this project. My Granny’s towel used a bulky acrylic yarn, which would be fine for this project. We didn’t have anything quite that weight at Yarnia, and I preferred a natural fiber, so I picked a worsted-weight cotton—Rowan Handknit Cotton. I grabbed a US 7 hook, and my Gleener sewing kit, too.
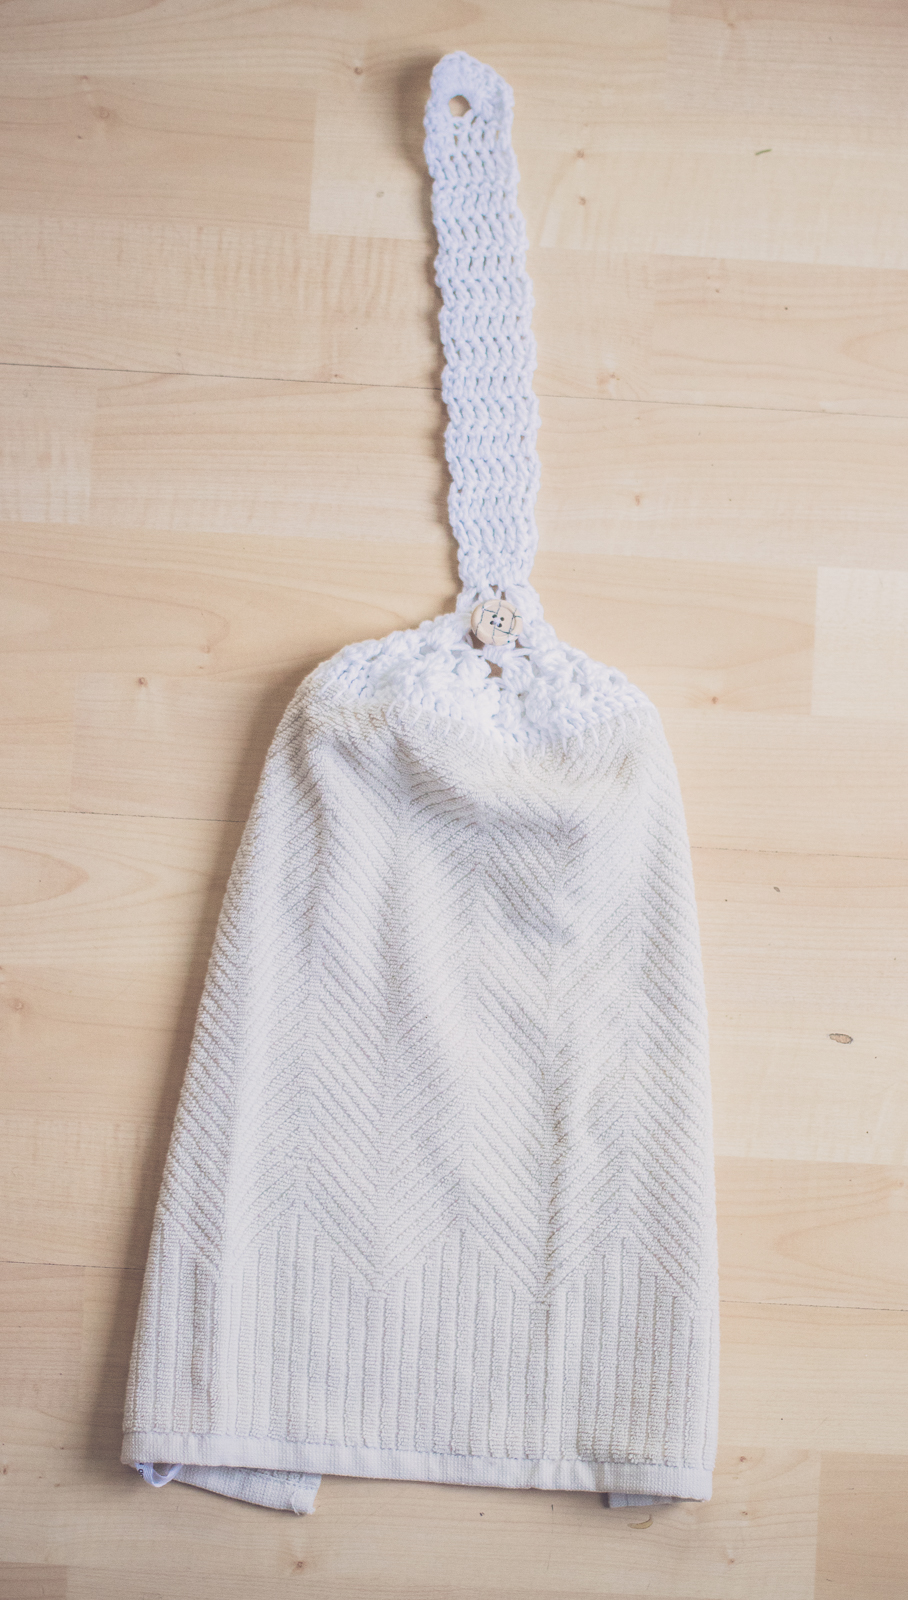
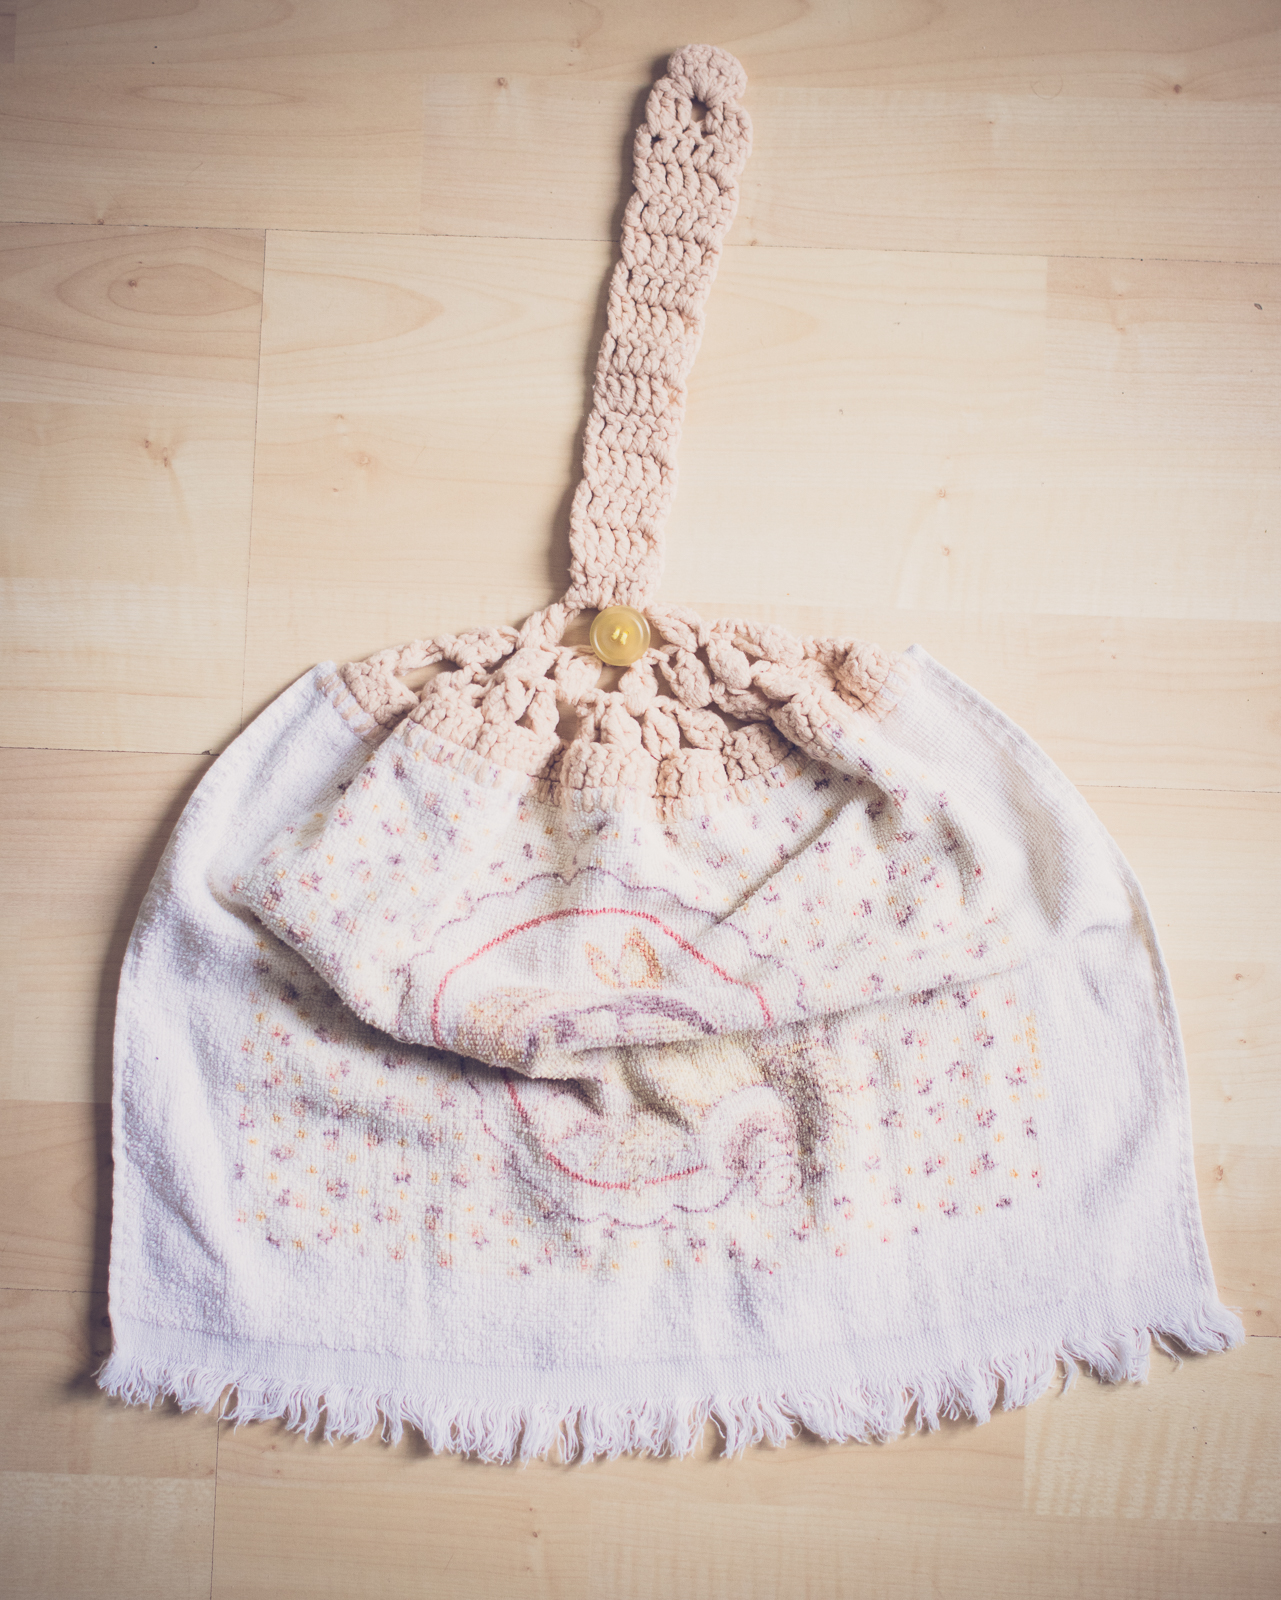
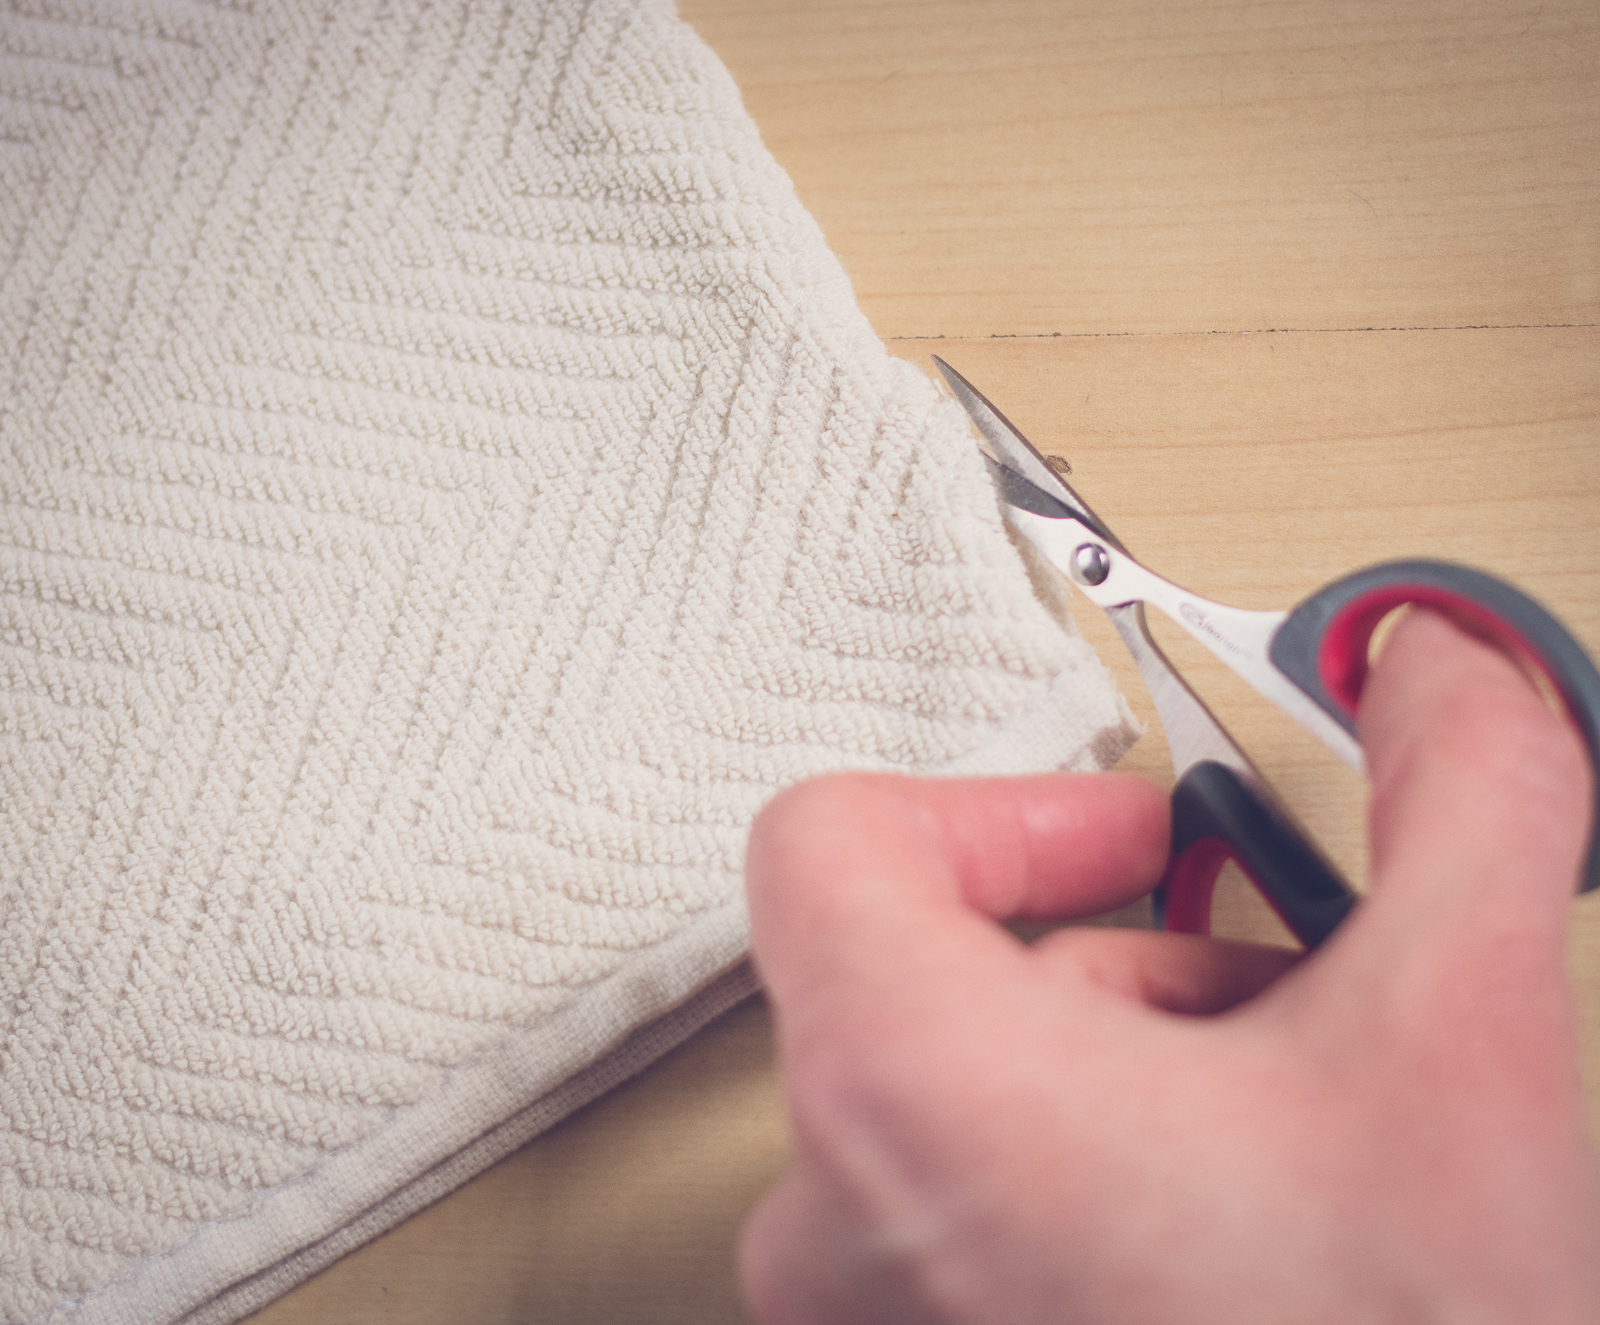
What I noticed first off is that the towel wasn’t full length—it was half the length of a normal dishtowel! This makes sense—when you hang a towel over the handle of the oven or the refrigerator, the amount it hangs down is half the length of the towel (because the other half hangs on the other side of the handle). In this case, we only have one thickness of towel, so only half the length…step 1 was to cut the towel in half. (Incidentally, this means you get 2 dishtowels with a topper out of each dishtowel you buy!)
Next, I rolled down and quickly whipstitched the cut edge with a similar-colored thread. To be honest, when I did this project the first time (with the first dishcloth my mom sent—the ones I finished in time for Christmas), I didn’t do this step. I just folded down the top edge. The cut edge was definitely visible and didn’t look as tidy as I wanted it to. I intended to use my sewing machine to baste down the top edge, but on the day I had to document this project I wasn’t near my machine…so hand-sewing it was! It actually only took about 5 minutes to tack down the edge, which is probably less time than it would have taken to get out and set up my sewing machine! Worth not skipping this step!
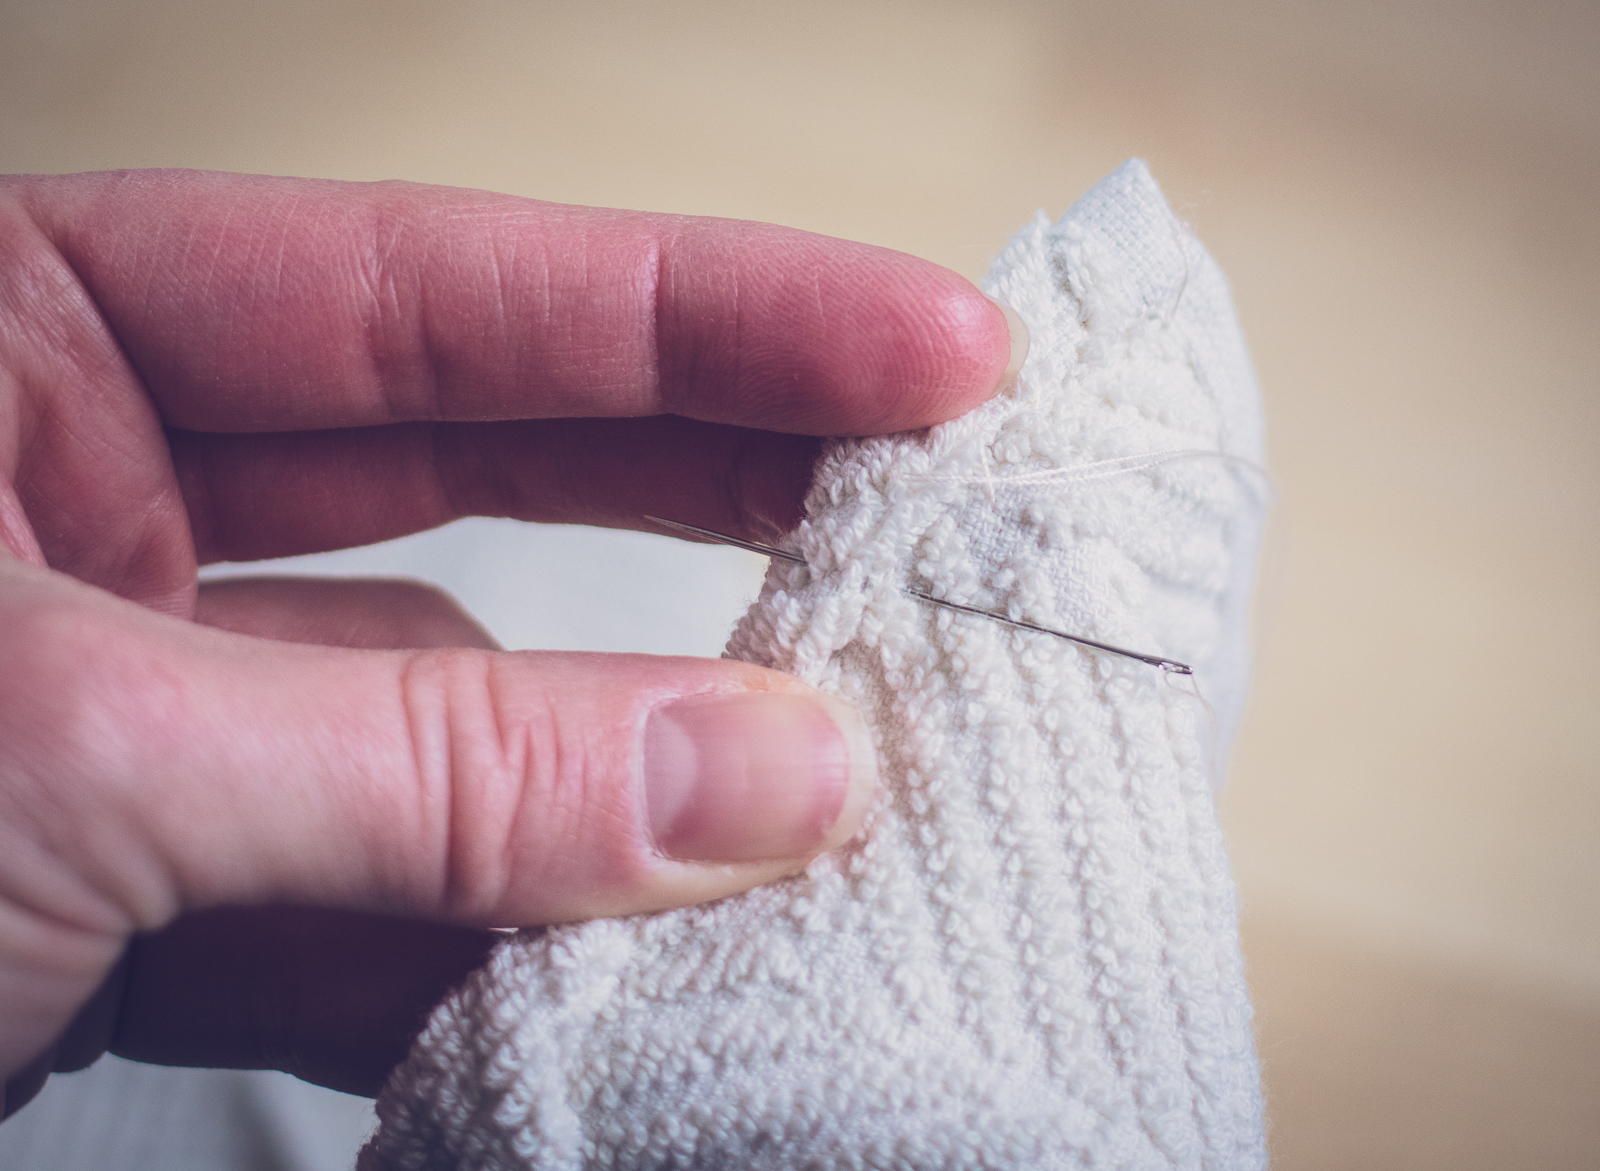
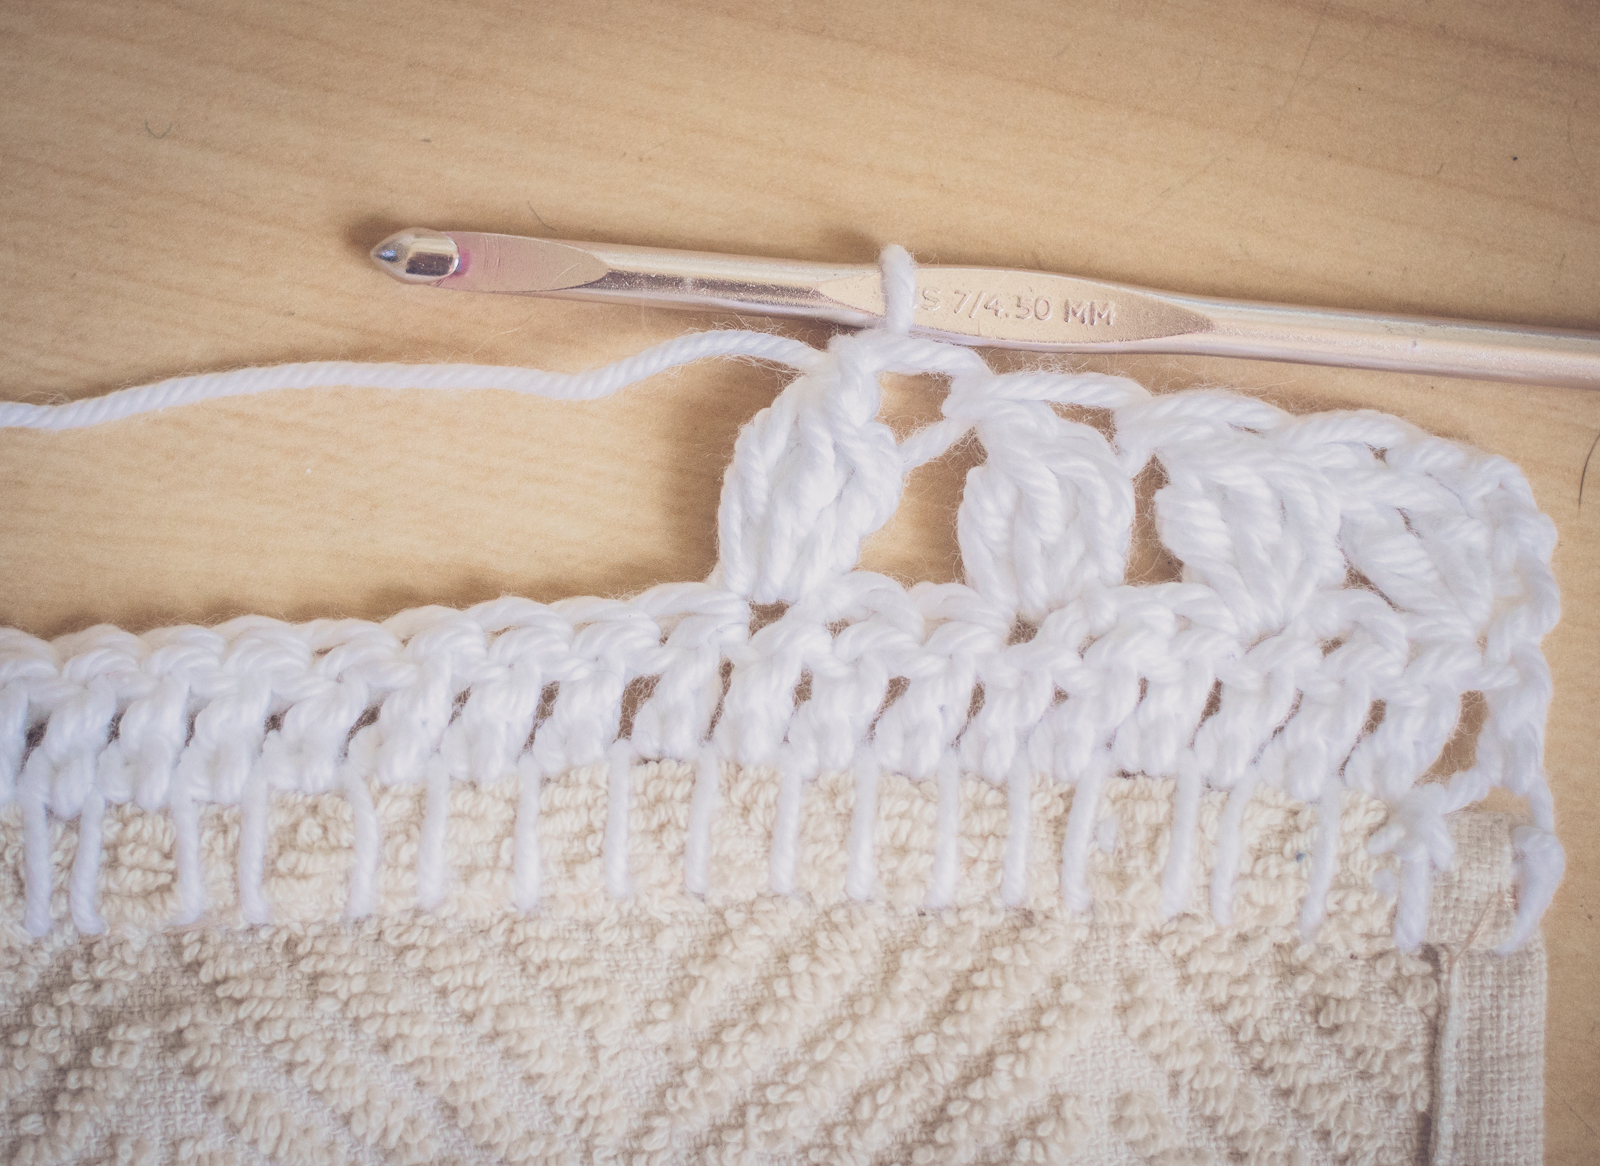
The next step was the key to my question: how do we attach crochet to a woven towel??? Looking at my Granny’s towel, I noticed that the first row of crochet wasn’t actually attached to the towel—first was a thin row of sewing across the top. The stitch used is a blanket stitch—that’s an embroidery technique that makes a decorative border on the edge of a fabric (check out a video tutorial here).
In the next step, I double-crochet into the loops the blanket stitch creates along the top of the towel…here’s a tip: the distance between each blanket stitch should be about the width of a crochet stitch in the yarn you’re using. A good guide to the stitch width is to use the width of your crochet hook. If the blanket stitches are too close together, it will be hard to get your hook through the top loop. Too far apart and the first row of crochet will look sloppy. The goal is to have even stitch depth and width…but if it’s not perfect don’t worry!
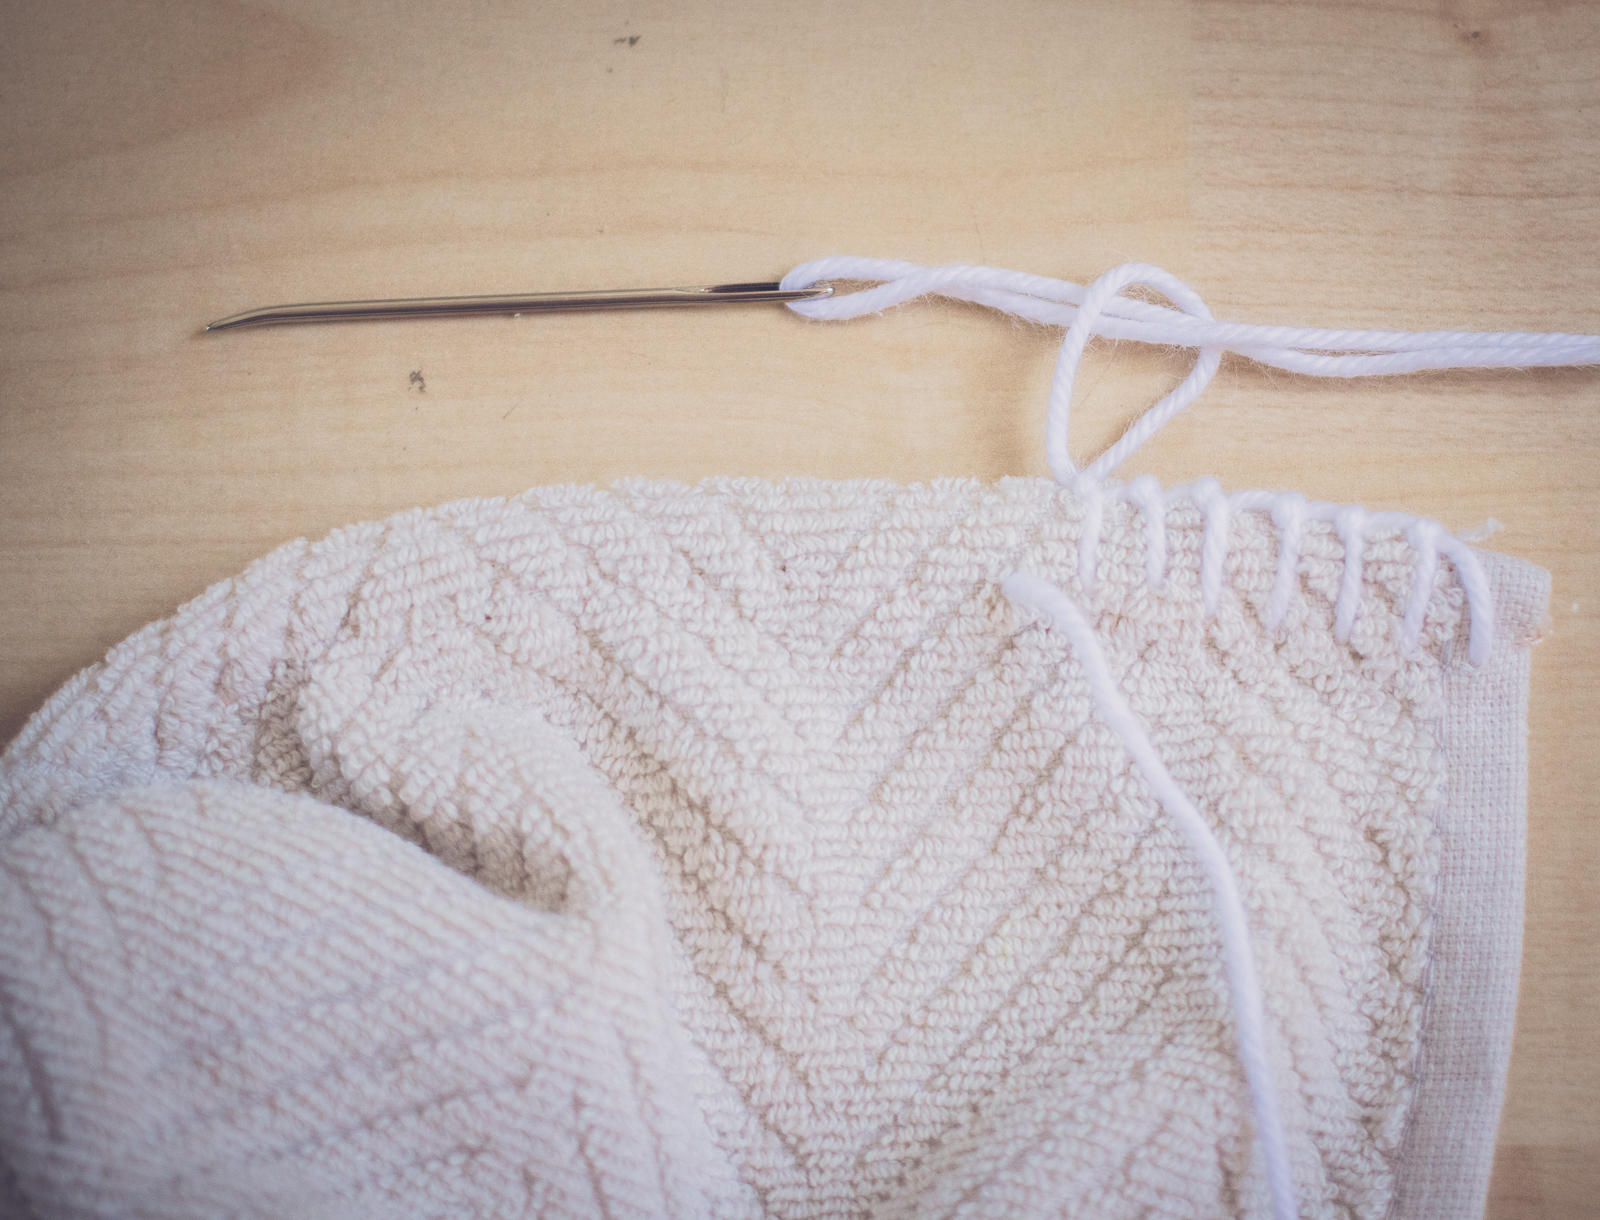
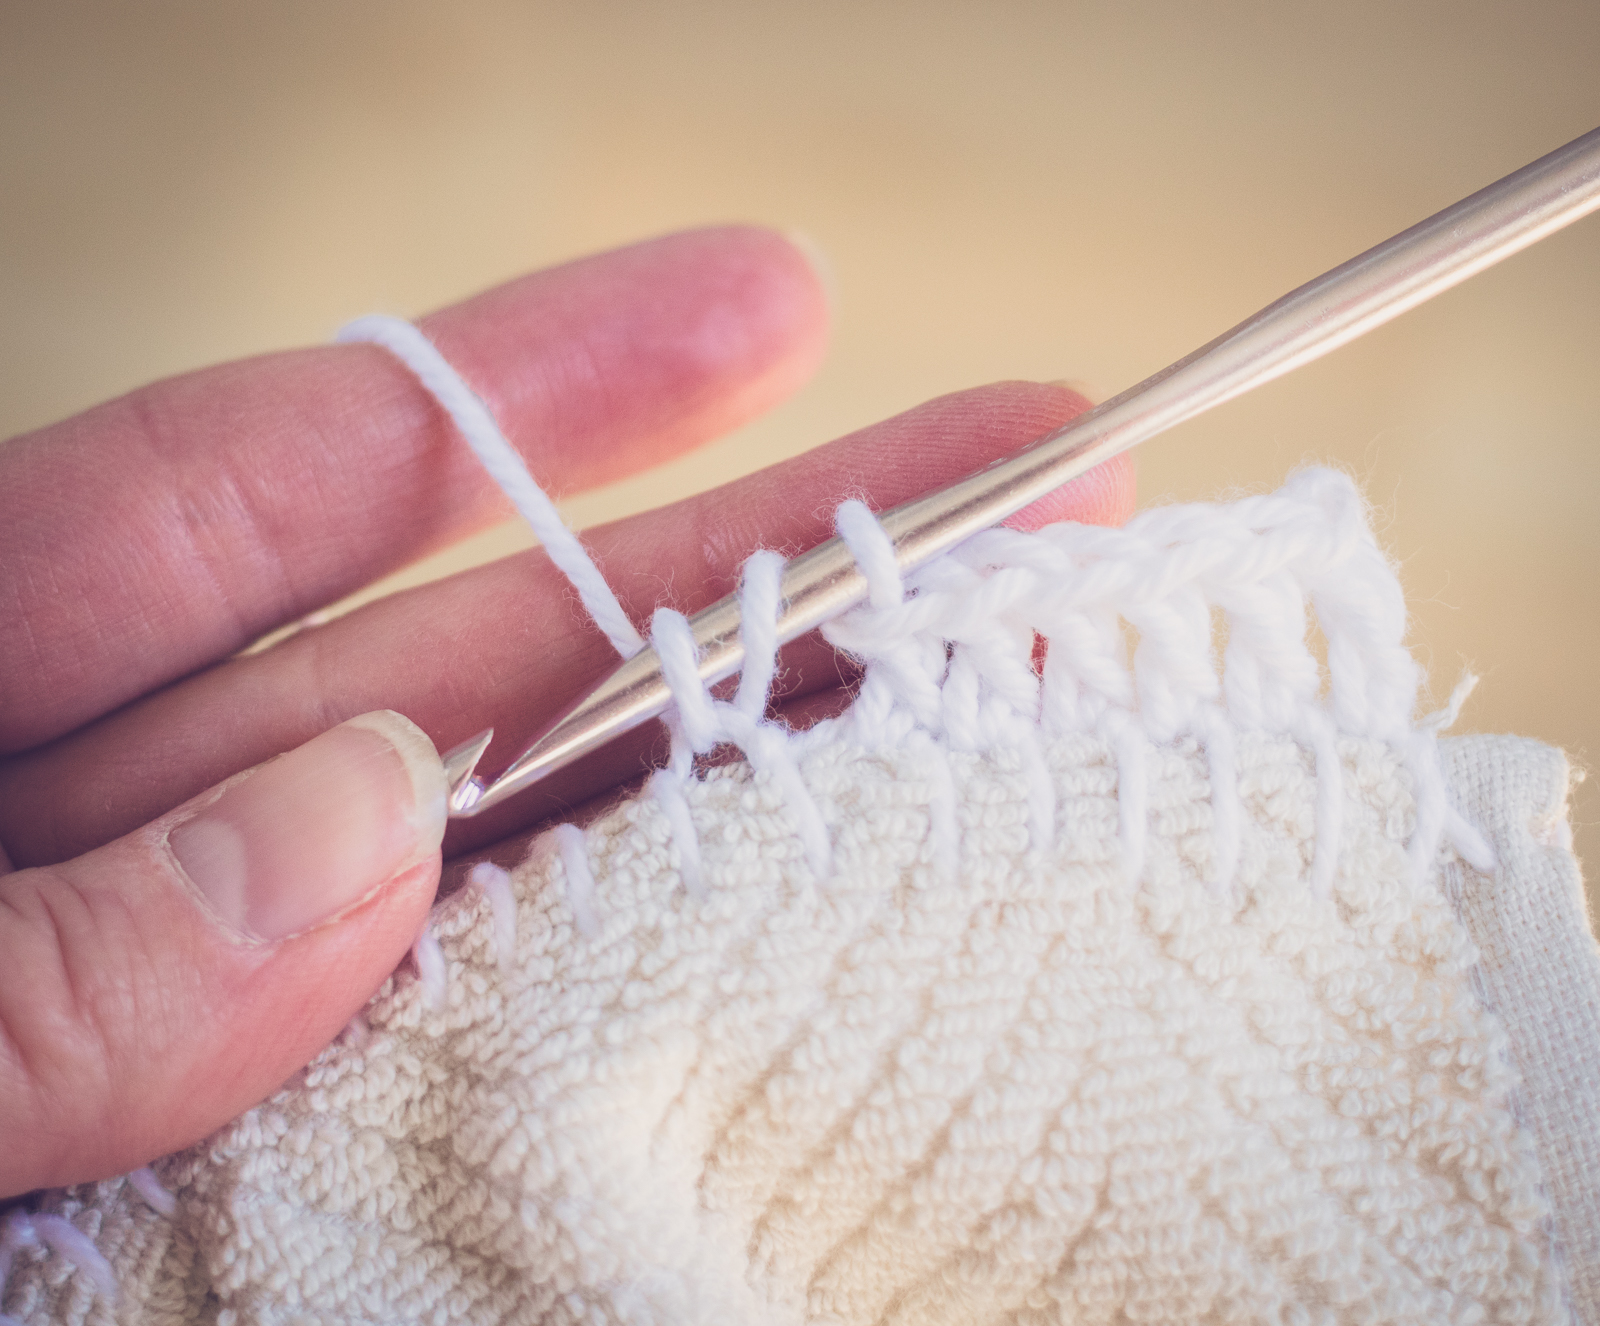
Now to the fun crochet part! Join in the top loop that the first blanket stitch created along the top of the fabric. Work in Double Crochet across the whole top of the towel. This is your first row, and attaches your crochet to the towel. If you want a longer towel hanger, you can work a second or third row of Double Crochet at this point, or any other decorative stitch you would like.
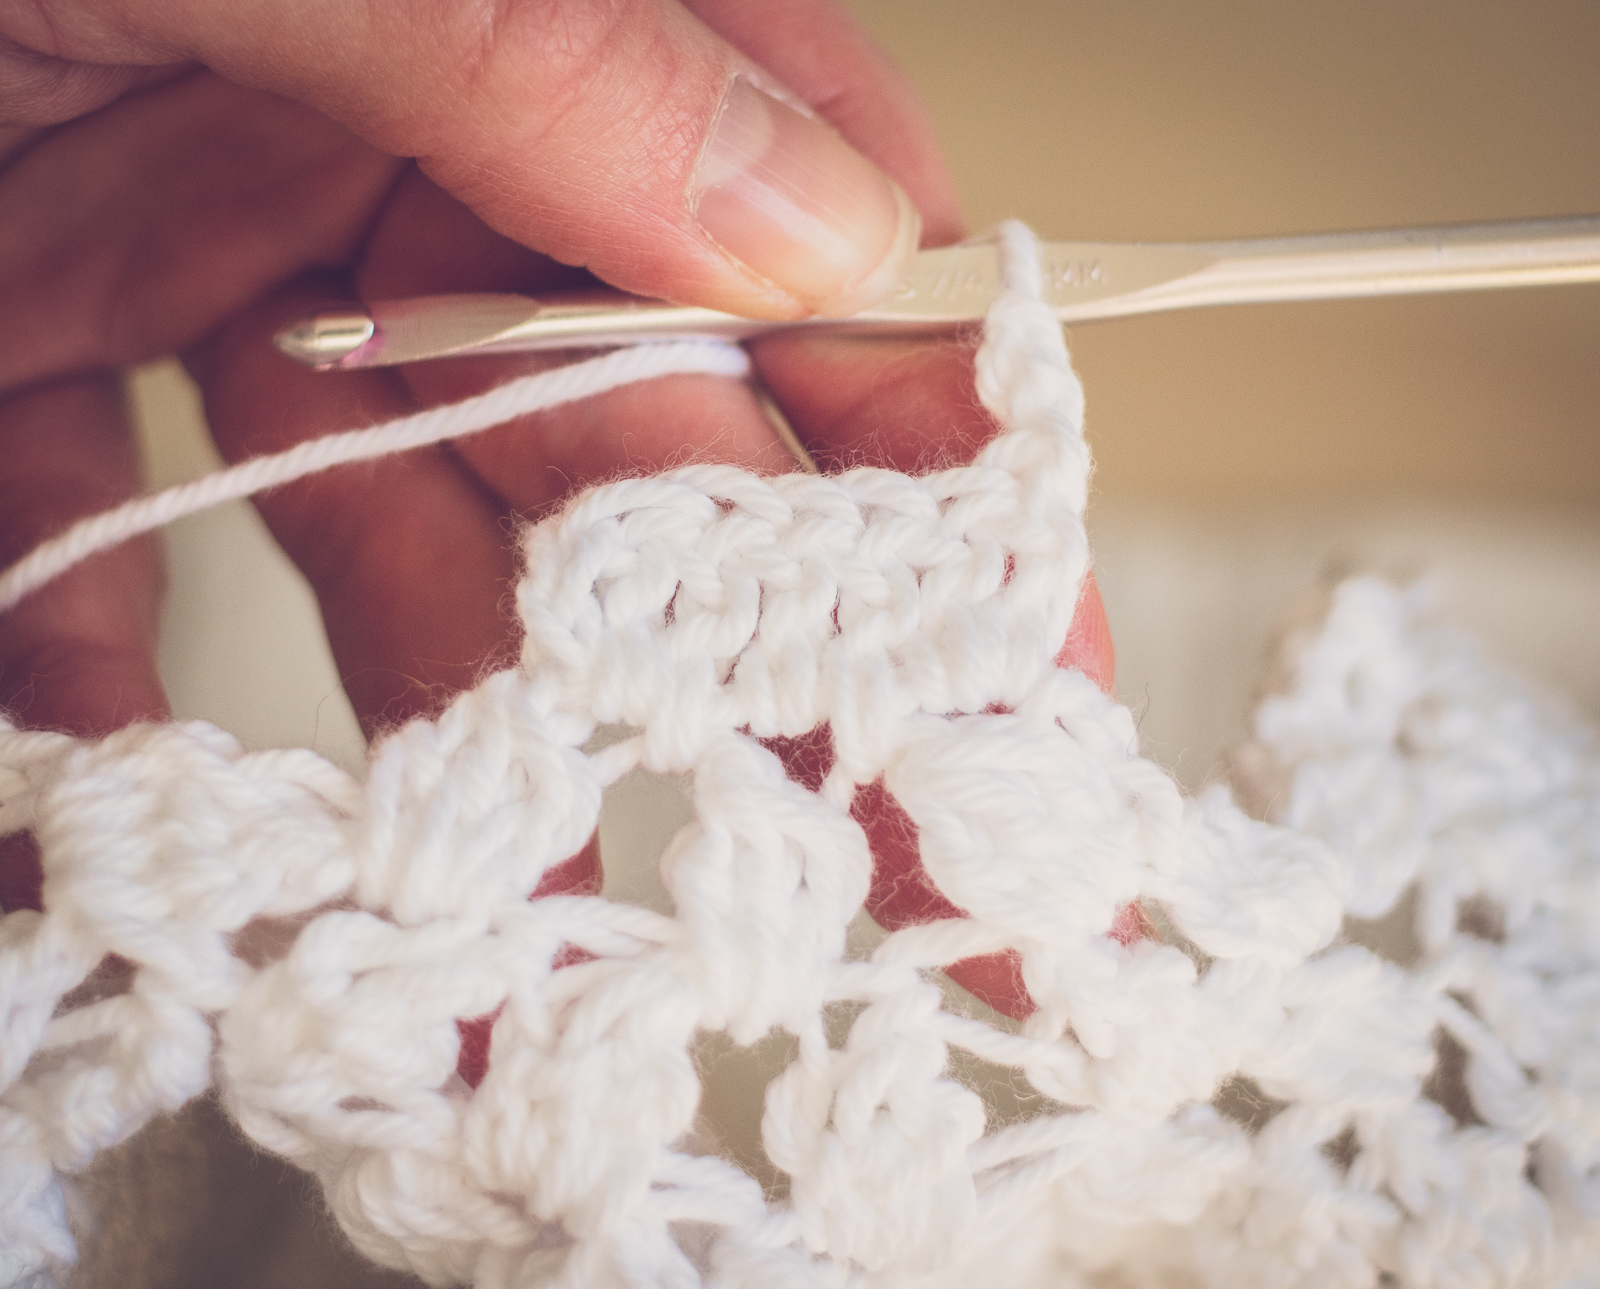
Next, we need to decrease dramatically to get to make the top of the towel topper. To do this, I use an Extended Bobble stitch in this way:
- Yo, insert the hook into the indicated stitch or space and pull up a loop – 3 loops on the hook.
- Yo, pull through 2 loops – 2 loops on the hook.
- Yo, insert the hook into the same stitch or space and pull up a loop – 4 loops on the hook.
- Yo, pull through 2 loops – 3 loops on the hook.
- Yo, insert the hook into the same stitch or space and pull up a loop – 5 loops on the hook.
- Yo, pull through 2 loops – 4 loops on the hook.
- Yo, pull through 3 loops – 2 loops on the hook.
- Yo, pull through remaining 2 loops
I worked the Extended Bobbles (ExBobble) over each row like this: ExBobble in the first stitch, skip 2 stitches, ExBobble in the next stitch, skip 2 stitches. I continued this pattern over the entire row to the end. Ending the row with an ExBobble in the last stitch is important…but depending on a lot of factors (how wide your towel is, how thick your yarn is, how many blanket stitches you put on the top row of your towel), you may not have room to skip 2 between every ExBobble. That’s ok! When you get to the end, if you can only skip 1 before the last stitch, do that. The stitches are forgiving.
On the following rows, I continued in the same pattern--ExBobble on the first stitch, work across skipping 2 stitches between each ExBobble, and ExBobble in the last stitch—unitl I completed a row that had only 3 ExBobbles in it. Now it’s time for the Button Hanger part of the towel!
To start the Button Hanger portion, chain 2, then DC into the first stitch. I put 2 DC into the next stitch and 3 into the 3rd stitch, for a total of 7 DC (that is, 1 ch2 and 6 true DC) across the 3 ExBobble stitches in the previous row. I repeated this row until the button hanger was about 8 inches long.
The last step is to make the button hole. To make the buttonhole, I started with a DC into the space between the 3rd and the 4th stitch. I did NOT start this row with a chain 2…we want the shell around the buttonhole to be flush with the end of the last DC row, so don’t start the row with a chain. I continued to DC into the same space between the 3rd and 4th stitch until the stitch was totally full and stretched out—9 DC in my case, but there may be more or less depending on your tension and yarn. Finish with a single crochet into the edge of the last stitch to attach the shell to the other side, then pull through your yarn to end off.
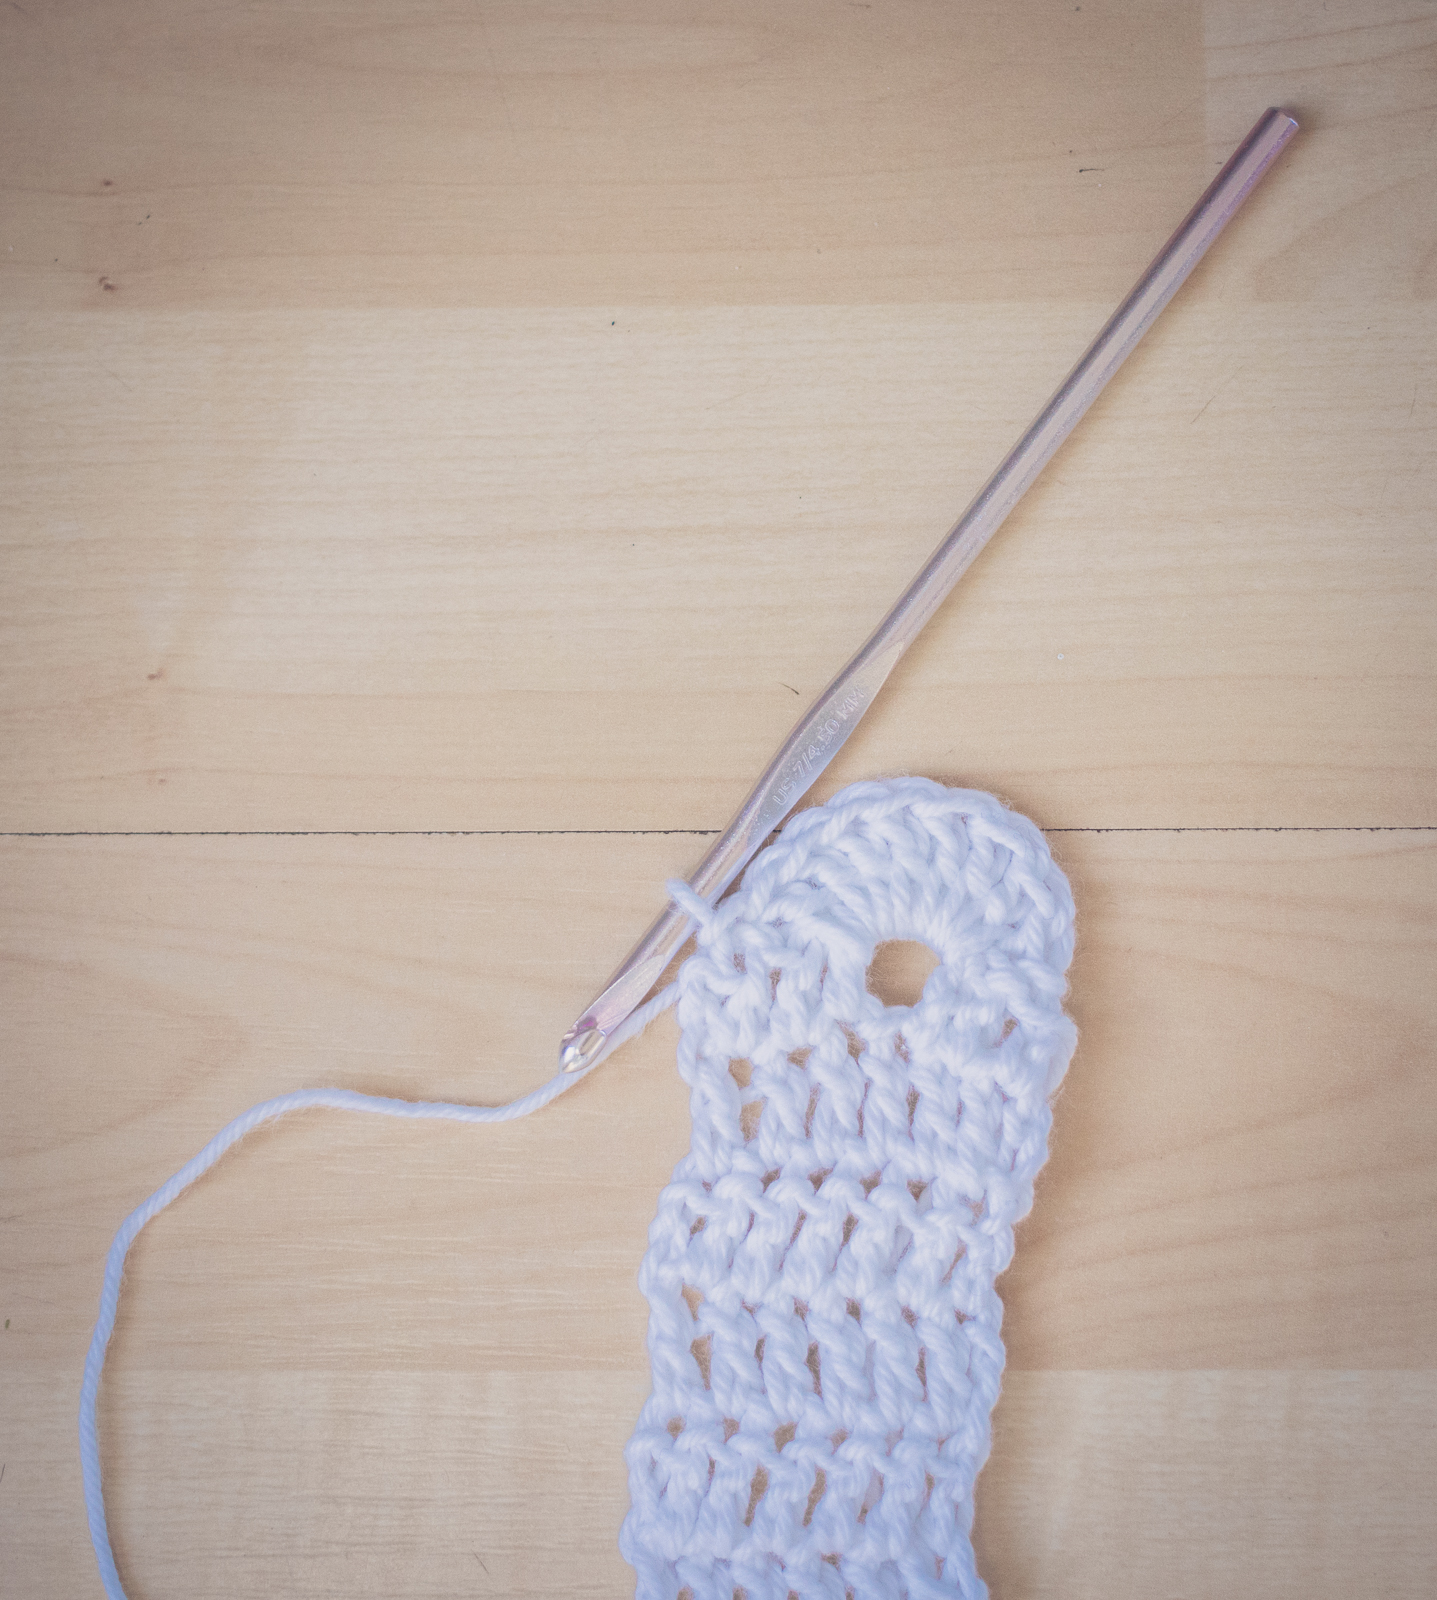
That’s it! Weave in ends, then take your finished towel to your local yarn store and find a button to match. I picked out some Dritz recycled plastic buttons that were a great color match.
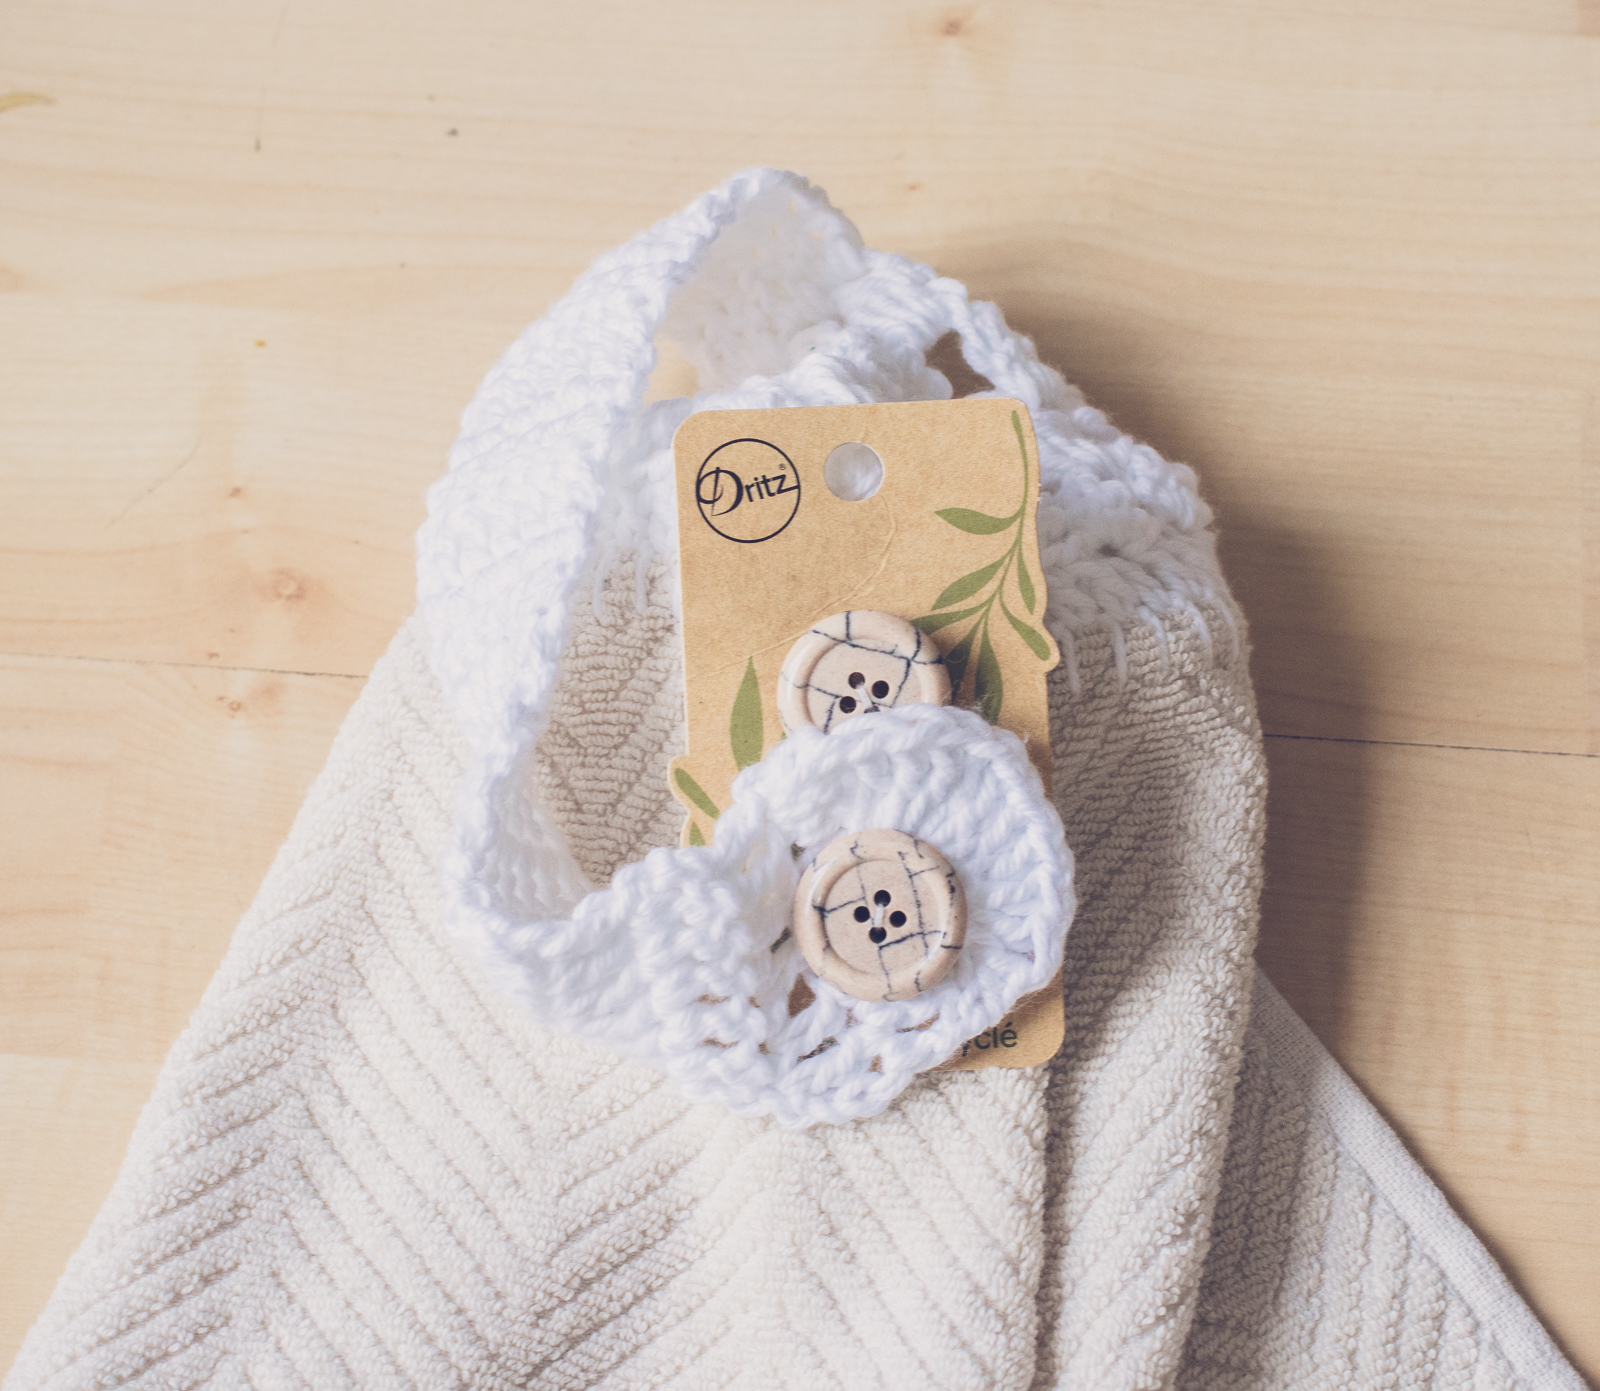
Don’t these look great? And a good replica of the original, I think! I hope Mom will enjoy these for a lot of years, and if she ever needs new ones, they’re super-easy for me to make for her. I hope you enjoy this too—it’s a great craft for your kitchen or a quick gift! ~a